Showing posts with label Eat good food. Show all posts

Saturday, December 17, 2011

Handmade Holidays


The holidays make me think of being home and celebrating the day to day blessings I have with my family.  Like many families we are quite busy and I often feel like I'm not honoring the moments I have with them as much as I should.  I miss being home with them more so I have been trying harder to create special memories with them when I am home.  The holiday season brings up this desire even more.  So this year when it came time to think about giving something special to the wonderful teachers in our lives I decided it was time to get my hands dirty again and get crafting.  


 We decided to make peppermint bark this year.  This is a very simple project and there are lots of great recipes online for it.  We chose one that combined both dark and white chocolate.  I bought all the ingredients on my lunch break the other day along with some jelly jars to package the pieces up in.


 It all starts with good chocolate.  Personally I buy Ghiradelli for my cooking and the bags of chips happened to be on sale and so it was a better bargain than buying the bars.  I just placed a bowl of chips over a pot of boiling water (1 Bag) until the chips melted.  Once melted I added a teaspoon of peppermint extract and poured half of it into a small brownie pan lined with tin foil and the other half in a second pan also lined with tin foil.  Plop that in the fridge or freezer for about 20 minutes and wait.  Once hardened you can take it out, and after melting the white chocolate you can then pour the white over the dark, sprinkle on crushed candy canes and place back in freezer.


Once the chocolate is hard you can take it out, peel off the tin foil and chop it up or break it into pieces.


I chose to put our bark into jelly jars and tied some ribbon around them.  
It's easy, fun, tastes great and makes a wonderful handmade gift.

Yum.
I hope the teachers enjoy it.

Sunday, December 11, 2011

Vegan Peanut Butter Chocolate Chip Cookies

My kids have been begging me to make peanut butter cookies so we found a recipe, altered it a bit and made these this weekend.  They came out great.  Soft and moist, not hard and crumbly.  I cut back the sugar and chocolate chips from the original recipe because I like to be able to enjoy a few cookies without feeling like I'm on sugar overload.  I thought the original had an overwhelming amount of chocolate chips.  Plus I think they just taste better this way.  I decided to go with a vegan recipe because I could not stomach the amount of butter needed for the non-vegan recipes.  These are just as tasty and a little healthier for you.

This is my altered version.  I already cut down the sugar and chocolate chips below.


  • 2/3 cup + 2 tablespoons crunchy peanut butter
  • 4 tablespoons safflower oil
  • 1 1/2 cups light brown sugar
  • 2/3 cup soymilk ( regular or vanilla flavored)
  • 2 teaspoons pure vanilla extract
  • 1 cup all-purpose flour
  • 1 teaspoon baking soda
  • 1 teaspoon salt
  • 2 cups rolled oats
  • 1/2 - 1 cup semi-sweet chocolate chips 

    Directions:


    1. 1
      Preheat oven to 375 degrees.
    2. 2
      In a large mixing bowl, stir together first five ingredients.
    3. 3
      In a small bowl, thoroughly stir together flour, soda and salt.
    4. 4
      Stir into batter.
    5. 5
      Stir in oats and chocolate chips.
    6. 6
      Drop batter by rounded tablespoonfuls onto parchment lined baking sheet, or oil the baking sheet.
    7. 7
      Bake for 10 minutes or until set.
    8. 8
      Remove sheet from oven and let cool on tray for 5 minutes.

Thursday, November 11, 2010

Sicilian Orange and Fennel Salad

This recipe comes from one of my new favorite cookbooks called Sicilian Feasts. I have always been in love with Sicilian culture since it is where my mother's family is from. I received this cookbook last year as a gift and it has quickly become one of my favorites. What I love about Sicilian cooking is that it is simple and flavorful. I made this dish for the first time tonight and it made my taste buds jump for joy. The entire family loved it.

Ingredients:

2 oranges
1 fennel bulb
2 tablespoons extra-virgin olive oil
1 tablespoon lemon juice

Directions:

Peel the oranges, and cut them into a bowl in chunks. Remove the feathery leaves from the fennel bulb and reserve for soup. Cut the fennel bulb into quarters and slice thinly through the core so that the bulb remains attached. Sprinkle with salt and pepper and mix well. Drizzle with olive oil and mix again. Add the lemon juice and mix for the last time before transferring to a serving platter.

enjoy!

Tuesday, August 04, 2009

Blueberries

$40 later I have some blueberries. yum. on Twitpic

I picked a lot of blueberries today. I had my two kids with me but they ate more than they picked. I love freezing blueberries and having them for the winter. I did this last year and I had enough frozen berries to last me through March.

Friday, June 19, 2009

Food, Inc.

How much do we really know about the food we buy in the supermarket and serve to our families?

I am very excited about this movie. Please watch the trailer, watch the movie when it comes out, and get involved. I truly believe that food (or the lack of real food) is the biggest health crisis we have in this country. We have to open our eyes, read the labels, educate ourselves, stand up and say no more!

Monday, June 15, 2009

Monday harvest


CSA Farmshare
Originally uploaded by subsixstudios
I love Mondays now that summer is here because it means my weekly pick up of my CSA farmshare. This week I received two heads of lettuce, salad mix, garlic scapes, pint of strawberries, dill, scallions, and cilantro.

Ever wonder what to do with garlic scapes? There are many possibilities but my favorites are to add them to stir fries, make garlic scape mashed potatoes, or garlic scape pesto.

Here is a recipe for garlic scape pesto.

Garlic Scape Pesto

Ingredients:
1 cup garlic scapes (about 8 or 9 scapes), top flowery part removed, cut into ¼-inch slices
1/3 cup walnuts
¾ cup olive oil
¼-1/2 cup grated parmigiano
½ teaspoon salt
black pepper to taste

Directions:
Place scapes and walnuts in the bowl of a food processor until well combined and somewhat smooth. Slowly drizzle in oil and process until mixed. Scoop pesto out of bowl and into a mixing bowl. Add parmigiano to taste; add salt and pepper. Makes about 6 ounces of pesto. Keeps for up to one week in an air-tight container in the refrigerator.

Thursday, May 28, 2009

Eat good food: Baked ziti with roasted peppers

The original recipe comes from the Moosewood Restaurant New Classics I have altered it slightly and put my version here.

Ingredients:

Tomoato sauce
2 tablespoons olive oil
1 cup chopped onions
2 garlic cloves minced
1 teaspoon salt
1/2 teaspoon ground black pepper
1 28 oz can of crushed tomoatoes
1 tablespoon of dried Italian seasoning

2 Red peppers, seeded, and cut into long strips
2 tablespoons olive oil
1 pound penne
2 cups ricotta cheese
2 cups grated provolone cheese
2 garlic cloves, minced
1/2 cup chopped fresh basil
1 tablespoon dried oregano

Directions:

In a saucepan, warm the oil and saute the onions, garlic, salt, Italian seasoning, and black pepper on medium heat until the onions are very soft, about 10 minutes. Add the tomatoes and simmer on low heat for about 30 minutes.

Meanwhile preheat the broiler. Lightly oil a baking pan. Breing a large pot of salted water to boil.

In a bowl toss the peppers with oil. Spread them evenly on the baking pan and broil for about 10 minutes, until soft and slightly brown. Set aside and lower the oven temp to 350 degrees.

When the water boils, add the pasta and cook until al dente, about 7 minutes. While the pasta cooks, stir together the two cheeses, the garlic, basil, and oregano. When the pasts is al dente, drain it and stir it into the cheese mixture.

To assemble, spread 2 cups of the tomato sauce in the baking pan. Layer on the pasta and cheese, the roasted peppers, and finally cover with the rest of the tomato sauce. Bake for 20-30 minutes until piping hot.

Wednesday, February 11, 2009

breaded polenta cutlets

This is one of my new favorite recipes. It is from the Moosewood Restaurant New Classic cookbook. (I have only changed the original slightly by omitting ground fennel.) I served these with potato parsnip gratin, green beans and a salad. The kids chose to dip them in ketchup (big surprise), and I found they were great as leftovers too.

Ingredients:
1 teaspoon salt, or more to taste
2 1/2 cups water
1 cup cornmeal or dried polenta
1 cup chopped onions
1 or 2 garlic cloves, minced or pressed
2 tablespoons olive oil
1/2 cup Parmesan cheese (optional)
1 egg
1/4 cup milk
1 cup herbed bread crumbs
(to make your own breadcrumbs pulverize stale or lightly toasted whole wheat, sourdough, or french bread in a blender or food processor. Mix in 1/4 teaspoon of mixed dried herbs, such as basil, oregano, thyme, and marjoram, and add a dash of salt and black pepper)

Directions:
1. Bring the salt and water to a boil. Gradually pour in the cornmeal and stir briskly with a whisk until the polenta begins to thicken. Lower heat and simmer, stirring frequently, until the polenta tastes done.

2. Meanwhile, saute the onions and garlic in the oil on medium heat for about 7 minutes. Remove the cooked polenta from the heat. Stir in the onion/garlic mixture, and if using , the cheese. Add salt to taste.

3. Pour the hot polenta onto an oiled baking tray or 10 inch pie pan to about 3/4 inch thick. Spread evenly with a rubber spatula. Refrigerate for at least 30 minutes. The polenta will thicken as it cools. *Side note - Polenta can be refrigerated for 3-4 days so you could always do this step one day and finish the dish another.

4. Preheat the oven to 375 degrees Fahrenheit. Lightly oil a baking sheet.

5. In a large bowl, whisk the egg until foamy and then whisk in the milk. Place the bread crumbs in a separate shallow bowl. With a table knife, cut the cooled polena into squares, rectangles, diamonds, or other shapes. Line up in order the pan of cutlets, the egg mixture, the bread crumbs, and the oiled baking sheet.

6. Lift one cutlet at a time with a spatula and dip it into the egg mixture. A light coating of egg is best, so gently shake off the excess. Then dip each cutlet in the bowl of bread crumbs and coat well. Arrange the breaded cutlets on the baking sheet about one inch apart.

7. Bake for 35 minutes until golden brown on both sides, turning once after about 20 minutes.

enjoy!

Monday, January 19, 2009

Garbanzo Bean Tacos

My family used to enjoy taco night by substituting meat for the Fantastic Foods Taco mix. In an attempt to cut out processed soy proteins and most fake meat products we have been going without tacos for some time now. I finally have a new reason to bring taco night back. I was a bit hesitant about whether this bean mix would fly with my kids but they devoured them up like crazy. Everyone seemed to agree these were far better than the ones we made with the boxed mix.

This makes a super quick and healthy meal. Garbanzo beans are packed with protein.

enjoy.

Garbanzo Bean Tacos

Ingredients:


2 can garbanzo beans
1 packet taco seasoning (try to find a natural version like Bearitos taco seasoning mix)
2/3 cup water
lettuce
hard taco shells or lard-free tortillas
tomatoes
onions
salsa or taco sauce
any other items you like on your taco

Directions:


Drain and rinse garbanzo beans. Stir together the garbanzo beans, water and taco seasoning pack to a skillet and heat on medium until sauce begins to thicken. Let simmer for about 10-15 minute or until sauce has thickened to your liking. Add more water if you so desire.

While the beans and sauce are simmering begin warming up your taco shells in the oven and prepping your toppings. Once the bean mixture is done it needs to be served right away so you want to make sure you have everything else ready to go.

Take a large spoon or fork and mash the beans while still in the pan. They shouldn't be as mashed as refried beans. Leave a bit more chunky.

Add bean mixture and other ingredients to your tacos, burritos or salads.

Monday, January 12, 2009

Asian delight

Peanut noodles, baked tofu, napa cabbage salad and green beans.


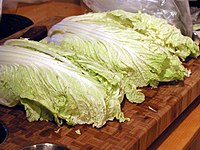
Have you ever wondered what to do with a head of napa cabbage? I just discovered the yummiest recipe that I want to share. Every two weeks I pick up a slew of veggies from my winter CSA farm share. The winter months are slimmer pickings of veggies they are able to store through the winter. I get carrots, potatoes, onions, root veggies, winter squash and cabbage every two weeks. It is so nice to be able to enjoy Vermont grown veggies all year. I have to admit though that when it comes to picking a cabbage I either don't or I do, and it goes bad in my fridge. This week I vowed to choose a napa cabbage and learn something new.

Napa cabbage salad seemed like the clear winner so I set out to make a meal around it and chose to serve it with peanut noodles, baked tofu, and green beans.

Napa cabbage
salad (adapted from a recipe I found on all recipes). I had to change the measurements of the original recipe because the amount of butter was about a triple the amount of what I list here and was just not needed. I also cut the sugar way down too. Here is my modified version.

Ingredients
1 head napa cabbage
1 bunch minced green onions
2 tablespoons butter
1 package ramen noodles, broken
1 cup slivered almonds
1/4 cup cider vinegar
1/4 cup vegetable oil
1/4 cup white sugar
2 tablespoons soy sauce

Directions


1. Finely shred the head of cabbage; do not chop. Combine the green onions and cabbage in a large bowl, cover and refrigerate until ready to serve.
2. Preheat oven to 350 degrees F
3. Make the crunchies: Melt the butter in a pot. Mix the ramen noodles, sesame seeds and almonds into the pot with the melted butter. Spoon the mixture onto a baking sheet and bake the crunchies in the preheated 350 degrees F oven, turning often to make sure they do not burn. When they are browned remove them from the oven.
4. Make the dressing: In a small saucepan, heat vinegar, oil, sugar, and soy sauce. Bring the mixture to a boil, let boil for 1 minute. Remove the pan from heat and let cool.
5. Combine dressing, crunchies, and cabbage immediately before serving. Serve right away or the crunchies will get soggy.

**side note - Spoon the dressing over the salad in small amounts. The original recipe made way more dressing than I ended up using. I just spooned some on until I like the consistency and the flavor. I think too much of this dressing can spoil it. Even though I cut the measurements down for the dressing I wouldn't go dumping the entire amount of the salad. This was a damn good salad. Even my kids liked it.

Peanut noodles
This is an adapted recipe. The original is called Karen's Sesame Noodles from one of my favorite cookbooks Feeding the Whole Family. I changed this up a bit to have more peanut butter and less tahini.

Ingredients


8 ounces whole grain noodles (thin spaghetti or udon noodles)
1 tablespoons tahini
3 tablespoons peanut butter (you can also use almond or cashew butter)
1 teaspoon maple syrup
2 tablespoons brown rice vinegar
2 tablespoons tamari
1 teaspoon sesame oil
1-3 tablespoons water to desired consistency.

Directions


Cook noodles in boiling water according to directions on package. While noodles are cooking put ingredients for sauce in bowl and blend until creamy. When noodles are cooked, drain and rinse. Pour sauce over noodles and toss well. **These are good warm and cold.

Baked Tofu

Ingredients

1 package of Extra firm tofu
Soy Vay Veri Veri Teriyaki sauce
Garlic powder

Directions


Drain tofu. Cut the tofu cake making two cakes and place on a plate with paper towels under and over the cakes. Press down to get as much water out as you can. I usually put a heavy book on top to help the process for about 10 minutes.

Next cut the tofu into chunks and place in a bowl. Add the enough Soy Vay Veri Veri Teriyaki sauce to cover tofu and mix so all the chunks are covered with sauce. Sprinkle with garlic powder and mix again. Put tofu in a baking dish and place in oven on 350. Cook for about 20 minutes or so flipping the tofu every so often. Tofu should be brown when ready.

*Excellent warm with your meal and enjoy cold the next day with the left over peanut noodles.
** Soy Vay Veri Veri Teriyaki is one of the ways I cheat in the kitchen. This stuff is so good and it makes it easy to spice up a lot of different foods. I use it a lot as a marinade on tofu, drizzle on rice and stir fries but I am sure it would be great on fish or other meats as well. It is pretty pricey in the store - over $4.00 a bottle but I have actually found it for half the cost at the Christmas Tree Shop. Check out the food section of the store and see if yours sells it. I have been buying mine there for a few years now. It is worth checking.

Monday, January 05, 2009

Rockin' Granola


I have been trying to wean my family off of store bought breakfast cereal. It is so expensive and the options are limited. I refuse to buy most store brand cereals because they usually contain a preservative called BHT that I am not a fan of and high fructose corn syrup which I think is one of the most evil ingredients ever to be added to our food. If we could remove that from our food I think our country would be a lot healthier. I won't go off on that now. Sorry for the rant. Ok back to cereal. So the other option is to buy the more expensive health store versions which I like a lot better but at almost $4.00 a box which only lasts in my house for two days it gets quite pricey. On the weekends I make eggs and pancakes but I can't manage to cook that much on school days. I have tried oatmeal and my kids won't touch it. John used to make batches of granola for us several years ago so I decided to give it a try. We love granola but again the store bought versions are even pricier than boxed cereal.

I made the following recipe this morning and tested it on the kids (and myself) for our afternoon snack. They both gave it the thumbs up while spooning mouthfuls of it mixed with rice milk.

The following recipe which I call Rockin' Granola is adapted from a recipe called Classic Crunchy Granola from the The Vegetarian Family Cookbook. My version adds combines honey and maple syrup and adds a bit more, plus I omit a few things and added a few things.

One last thing to note about my recipes. I am one of those people who don't always measure things so I will give an approximate measurement of somethings but I will keep it on the small side so you can add more (as I usually do). I will note these items which are not exact.

Ok ok here is the recipe

Rockin' Granola
makes about 6 cups

Ingredients
4 cups rolled oats (don't buy the quick oats)
1 cup wheat germ
1/2 (+) cup chopped pecans. ** I used a little bit more than 1/2 cup. Depends on how nutty you like your granola. I just happened to have pecans in the house leftover so I used those but you could use sliced almonds or cashews too. I might try more than one kind of nut in my next batch.
1/3 cup maple syrup
1/4 cup of honey
2 + tablespoons safflower oil
1/3 cup chopped up apple rings (optional. I personally don't like a lot of dried fruit in my granola so I stick with a smaller amount of the dried apples and I chop them small.)
Cinnamon to taste. I use probably almost 1 tablespoon of Cinnamon. I am a Cinnamon addict though.
Nutmeg - 1 to 2 dashes.

Directions:
1. Preheat oven to 275. Lightly oil a baking sheet.
2. Combine oats, wheat germ, and nuts in a large mixing bowl. Stir well.
3. Combine the maple syrup and 2 of the tablespoons of oil in a small container.
4. Combine the honey and just enough oil to thin out the honey a bit. No more than 1 tablespoon in a small container.
5. Drizzle the maple syrup mixture into the oat mixture, stirring constantly as you go until well covered.
6. At this point I felt it needed more so this is where I add the honey mixture as well. Drizzle some or all of this mixture mixing as you go.
7. Spread on the baking sheet and bake, stirring every 10 minutes 30 minutes or until golden.
8. Let the granola cool on the baking sheet. Transfer to glass containers for storage.

**experiment with the amount of honey you add. I like how it binds everything together so I thought it needed some added to it instead of just the maple syrup. The measurement of the honey is not exact however. I wouldn't do more than I listed but you could do a bit less.

enjoy

Thursday, December 11, 2008

Butternut Squash and Apple Soup

Today I am sharing my all time favorite butternut squash soup recipe. It has the addition of apples to give it a slight tartness I find delicious. This recipe comes from my cookbook bible The Vegetarian Family Cookbook by Nava Atlas. If you don't own this cookbook - go buy it. You won't regret it.

**The original recipe calls for 2 cups of milk (cow, rice, or soy) I choose to not add it when I make this soup so you will not see the milk listed below. I added it the first time and then never again. I prefer the soup without.

Ingredients:
1 large butternut squash
2 tablespoons olive oil
1 med-large red onion, chopped
4 cups peeled, diced apples, any cooking variety
4 cups prepared vegetable broth, or 4 cups water with 1 vegetable bouillon cube (my preferred method)
1/2 teaspoon ground ginger
1/4 teaspoon nutmet
Salt and pepper to taste

Directions:

1. Preheat oven to 400

2. Halve the squash lengthwise with a sharp knife and scoop out the seeds and fibers. Place cut side up in a shallow baking dish and cover tightly with foil. Or, if you like a more roasted flavor, simply brush the squash halves with a little olive oil and leave uncovered. Either way, bake for 45-50 minutes, or until tender. Set aside until cool enough to handle.

3. Heat the oil in a soup pot. Add the onion and saute over medium-low heat until golden, 8-10 minutes.

4. Add the apples, broth, and spices. Bring to a simmer, then cover and simmer gently until the apples are soft, about 10 minutes.

5. Once the the squash has cooled, peel and cut into chunks.

6. In a food processor (I use a blender and it works great) puree the squash with some of the broth you have simmering on the stove.

7. Transfer the apple-onion mixture from the broth into the food processor and puree until smooth. I do this in batches with the squash until is smooth and then return it to the soup pot and stir well.

8. Bring soup to a gentle simmer, then cook on low heat until well heated through, 5-10 minutes. Season with salt and pepper to taste.

This soup is great on it's own with hearty bread and salad or serve it along side of a casserole, macaroni and cheese or black bean quesadillas.

enjoy!

Monday, December 08, 2008

Almond Pancakes

I have tried many pancake recipes and this one has become my favorite. We make these every Saturday.

Taken from Beyond the Moon cookbook.
makes 9 large or 12 medium pancakes

1 Cup whole wheat pastry flour
1 cup unbleached white flour
2 teaspoons baking powder
1/2 teaspoon baking soda
1/2 teaspoon salt
1 teaspoon ground cinnamon
3/4 cup ground almonds (optional) *I usually make them without but would give a good strong almond flavor if you add them.
2 large eggs
2 1/2 cups of milk (soy, cow or rice)
2 teaspoons almond extract
2 tablespoons canola or safflower oil
butter for cooking
maple syrup for serving
** add blueberries if you so desire. I do and it is good!

Stir together the flours, baking powder, baking soda, salt, cinnamon, and ground almonds (if using) in a medium sized mixing bow.
In another bowl, beat the eggs with the milk, almond extract, and oil.
Pour wet ingredients into dry, stirring just until blended.
Melt butter in pan and ladle batter into pan. Cook until the tops are bubbly, 3-4 minutes. Flip and continue cooking until the bottoms are lightly browned. Serve with maple syrup.

Thursday, December 04, 2008

Garlic pesto grilled cheese

Here is my solution to making a simple grilled cheese sandwich a little more adult and tasty. This comes from my own recipe box. When I make the boys a grilled cheese I make one of these for myself. It is one of my favorite lunches.

Ingredients
2 slices of good bread
1-2 slices of real cheddar cheese (I highly recommend Cabot)
1 garlic clove
1 tablespoon of pesto
Salsa for the side of the plate

Directions
Peel and slice the garlic clove into thin slices.
Spread the pesto on the inside of both slices of bread.
Place the cheese on one side with the garlic slices on top of the cheese
Slap the two pieces of bread together and cook in fry pan with butter as you would a regular grilled cheese until both sides are brown and the cheese is melted.

Add a side of salsa on your plate for dipping.

Yum.

Friday, November 14, 2008

delizioso!


I have recently been trying to cut back on the fake meat soy products in an attempt to cut back on processed soy. I am not a nutritionist but I know enough about the topic to agree with some of the recent articles regarding our now over consumption of processed soy products. Soy became the next craze and now you can't get away from it. Recently I found soy listed as an ingredient in several Celestial Season teas. In my opinion you eat it in moderation as you should with everything. Try to stick to the least processed versions. Tofu, tempeh, miso and soymilk, in my opinion are the safest bets. Just limit how much of them you eat. What I would avoid or seriously limit are all of the fake "meat" products out there. If you flip over the box of the most mainstream brands you will find soy protein isolates as one of the main ingredient. Soy protein isolates have been in the news lately. Do some research.

I have been a vegetarian for 16 years now and cooking has become a passion of mine. I have come a long way from the pasta and bagels with cheese I used to live on when I first turned my back on meat in college. In becoming a vegetarian I also migrated towards natural cooking. Starting a family 7 years ago also forced me to stretch my culinary passion even further in the attempt to feed my family whole foods as much as possible.

Lately I have been trying to cut some soy out of our lives and save some money. This week my focus was on a substitute for meatless meatballs.
Being part Sicilian I love a bit of substance with my pasta but I am sick of buying frozen soyballs. I wanted to make a soy free homemade version and I have finally done it!

I was bursting with joy last night after creating a recipe for what I am calling Sicilian round balls. I am not yet posting the recipe as I need to refine it a bit but I am thrilled to finally be able to rid myself of store bought, expensive, soy filled alternatives.

My husband and kids loved them. The real test will be my Italian mother. I called her up all excited last night and told her I thought my Gramma Grasso was smiling down from heaven.

They may not have been meat in my meatballs like she used to make but there sure was a ton of Sicilian passion and love.

Thursday, July 24, 2008

Go local

I have been on a mission to become a localvore. If you are wondering what that is, a localvore is is a person who eats only locally-grown and produced food. I am fortunate to live in a state that has a leading part in this movement. On top of of all of the local farmers, crafters etc in VT we are also lucky to have many locally owned restaurants and stores who support this effort by selling and using their products. With the oil issue being what it is now is the time to be looking inside your own state and finding what products you can buy locally instead of products that were shipped from across the country or from other countries.

Taking on this challenge hasn't been too hard. In the summer and winter I get all of my vegetables from a local CSA Farm Share and buy as much as I can locally of other products as well. My Eggs, maple syrup, butter, cheese, veggies, fruits, salad dressing and flour all come from VT. There are some things I have had to slide on. For instance I can't yet give up avocados or bananas. This movement has taught me though to shift my eating habits quite a bit. I have become more of a seasonal eater. Since I get all of my veggies from my local CSA I eat what I get from them. This means no salads in the winter because there isn't any lettuce. The summer months are filled with salads, tomatoes, squash, beans, carrots peas and greens. The winter months are filled with carrots, potatoes, fall squash, spinach and root vegetables. All foods they store all winter. I am able to get VT apples all winter too because Champlain Orchards does winter storage as well. On top of this I grow a small garden in my back yard. This year I have 6 monster tomato plants, 4 pepper plants, peas, beans, squash, corn, cucumbers and pumpkins.

Again this means shifting my fruit intake. I no longer buy apples from Argentina and New Zealand (where most are from in the grocery stores), I am trying to wean off of bananas, and I do still give in to grapes but only when they are from CA and not Mexico. I was giddy with joy when I went to the store yesterday to find organic local plumbs grown by Champlain Orchards where I also get my apples.

It is maddening to me how much of our food is produced outside of the US. Most of the big chain food stores do not list on their tags where the food is from but the local food coop that I shop at does. It is scary. VT is taking major leaps ahead in becoming a bit more self sufficient. It takes some adjustment in your diet but it is so worth it.

To learn more go HERE, HERE

Friday, February 22, 2008

Friday is Pie Day


Pizza pie that is. Having pizza on Friday for dinner is a tradition JB and I have done since before having children. Back in the day though we ordered out for pizza every Friday. Even after Enzo was born we were able to keep this tradition going. Once the second child was born and I stopped working we had to cut out things like going out for dinner and ordering pizza. So I started buying store bought dough and making our own pizza. I have recently moved to making my own pizza dough each week now and I am loving it. It takes a bit more time and there are some days where I wish I could just pick up the phone and call my order in, but I love the process of making the dough fresh each week. There is nothing like the taste of homemade dough. This is now one of the reasons I love Fridays. I love that it is the beginning of the weekend, I love making my pizza dough, I love happy hour, I love watching a movie in the evening with JB.

Hooray for Fridays!

Saturday, February 02, 2008

My daily fix


I have a weakness. I usually can't get through my day without it. I have tried to give it up but it just gets harder and harder. By mid afternoon I give in to my craving and pop some chocolate into my mouth.

Now any old chocolate just won't do. I am picky. I can't stand milk chocolate. It has to be dark. I have realized the higher quality the chocolate, the less I need to satisfy my craving. No crappy milk chocolate made with fake vanillin (yes look on the back - most are made with it now.) I want the real, dark stuff made with real vanilla extract. It is out there but you have to look.

My personal favorite is Lake Champlain Chocolates made right here in Burlington VT. They even have some great info on the health benefits of dark chocolate. All the more reason to eat some.

The way I satisfy my craving is to buy my favorite chocolate chips either these from Lake Champlain Chocolates, or these from Ghiradelli. I'm sorry but the cheap chocolate chips just won't do the same trick. The reasons these work so well is because of their size and flavor you can have just a few and you should be fine. Give me the cheap stuff and I would have to eat the whole bag. This way I keep a secret stash in the cabinet and I dip in just a few once day and I am good to go. Try it . I swear it works.

Tuesday, January 29, 2008

I'll have me some of these

Chocolate chip, oatmeal, coconut cookies


As much as I love to cook I have never been able to find the perfect chocolate chip cookie recipe. So I decided to adapt one today and make it my own. I actually squealed with delight when I took the first bite.

1 cup butter
1 cup sugar
1 cup brown sugar
2 eggs
2 tsp. vanilla
1 tsp. baking soda
2 tsp. hot water
1/2 tsp salt
2 cups chocolate chips
1/2 - 1 cup of oatmeal
1/2 - 1 cup coconut

Cream butter and sugars until smooth
Beat eggs one at a time, stir in vanilla
Dissolve baking soda in the hot water
Add butter along with salt
Stir in flour until well mixed
Add chocolate chips, coconut, and oatmeal

Spoon batter onto oiled cookie sheet and bake for about 10 minutes on 350.

This made about 3 cookie sheets full for me.

The coconut and oatmeal measurements are approximations. This was the part I added but I don't measure when I cook my own stuff so I don't have an exact measurement.

Monday, January 07, 2008

Menu planning

Every week I kick myself because I end up spending more at the grocery store than I wanted too. One thing that has really helped me keep a cap on it though is by menu planning. Each week I actually plan out what meals I am going to make. I try to always have at least 6-7 days worth of meals. Now I know this sounds harder but it really does help. I found that once I broke the meals into types or categories it helped. For example I knew that once a week I made a pasta, pizza, soup meal etc. So I start my list knowing in my head the basic categories of foods I generally make in a week. Mine typically looks like this:

Pasta
Pizza
Burrito
Soup
Stir-Fry
Veggie Burgers
Other

Those are my basic categories. Then when I plan my menu for the week I make sure I have the basics to make a meal in that category. Sometimes I have specific recipes I am using so I will write down detailed ingredients that I need for each one. So my next step would look like this.

Pasta - Stuff to make sauce, pasta of choice, parm. cheese, bread, salad
Pizza - dough, sauce, cheese
Burrito - tortillas, salsa, refried beans
Soup - whatever ingrediants I need for the soup I have chosen
Veggie Burgers - veggie burgers, potatoes, frozen veggie
Other - I do try to make something new at least once a week. I save these meals for the weekends when I have more time.


So that becomes my basic list. At least by filling out this basic list I know I have enough stuff to make 6-7 meals that week. I have found by doing it this way I save money because I am buying exactly what i need to make the meals that week. It is also less stressful because I don't have to frett about what I am making each night. I keep the menu plan on my refridgerator so each day I can just pick from the list.

It has really helped me save money and time. Now if only I can get better about all the other stuff I end up buying.